Showing posts with label wedding week. Show all posts

Wednesday, July 11, 2018

7th Wedding Anniversary: Copper

The Hubs & I just celebrated our seventh wedding anniversary!  Still feels like hardly any time at all.  The grandparents took Lil' Man for the weekend so that we could have a romantic getaway to Missouri's Wine Country, Hermann, MO.   Hermann was colonized in the early 1800's by German settlers, who were drawn to the area because it reminded them of Bavaria and the Rhineland back home (so much so that the next town over is named Rhineland).  Early government encouraged settlers to grow their own grapes by giving landowners money for "grape lots", and thus spawned a massive wine boom in the area.  It's still home to some of the most well known Missouri wineries, like Stone Hill , Hermannof, and Adam Puchta.
We found a super-cute apartment right downtown via AirBNB, took some historic walking tours, did some wine tasting, tried some new beers, and ate some AMAZING food.  We even did a little geocaching!
Filet with Norton wine & rosemary sauce, over spaetzle with goat cheese. YUM.

And on our way home, we decided to stop in Jefferson City and knock something off our bucket list--visiting the now-abandoned Missouri State Penitentiary!   I know...super-romantic, right?  But it was really interesting--it's the oldest prison in the U.S. and was in use until 2004. I'd like to go back and to the night-time ghost tour in the future. 
As you may know, we like to do traditional wedding gifts.  And the traditional gifts for the 7th year are copper or wool.  Since we got married in July, the idea of anything wool right now makes me hot and itchy. But copper...we can run with that!

David gifted me with a copper-plated birch leaf necklace that I love and have worn nearly every day since I got it:
And then while we were in Hermann, The Hubs noticed that the railroad was really active:
Found one.

So he wanted to smash a penny on the tracks.  So we left one on the tracks, went to go try some wines, and then when we came back....ta-da!
Originally I thought about just framing it, but then I saw this photo album that had a frame in the front, so I decided to go with that instead!
I originally wanted to find a copper-themed beer, but didn't have much luck. But then I remembered that we have our very own Copper Run Distillery just a few miles down the road.  So I picked up a bottle of golden rum and a few other necessities for making us some tasty cocktails.
7-Up for Seven years of good luck! :)

To check out the previous years' gifts, use the links below!


Tuesday, July 19, 2016

Fifth Wedding Anniversary Gift: DIY Wooden Puzzle

How time flies!  It's a little difficult to believe that The Hubs & I have been married for 5 years now.  Sometimes it feels like it was just last year...and other times it feels like it's been forever.  In a good way, I mean.
(Amycakes.  Still the best cakes on the planet.)


In the past 5 years, The Hubs & I have:
Traveled to 7 countries
Visited 20 states
Bought & sold 1 business, and
Made one really awesome child.
As you may know, I like to give at least one handmade gift each anniversary.  I've blogged about each here:
So Year Five is "Wood". (Or "silverware" according to the "modern" list.  But I'm of the opinion that the "modern" list isn't so "modern" anymore, so let's just stick with tradition, shall we?)  

There's no shortage of wooden gifts available out there, so it's all about what suits your spouse's personal tastes.  And mine has a taste for beer.  So I ordered him a custom engraved bottle opener wall mount for our kitchen:
And then I also wanted to make him something.  Like a puzzle!  But I was having a hard time finding a blank wooden puzzle that I could get in a reasonable amount of time, and that wouldn't cost a fortune.  Then it occurred to me...I could just BUY an existing puzzle and use that--it didn't have to be blank!

So I found a wooden tangram puzzle with a small frame.  Then I picked two photos--one from our wedding day, and one from very recent.  My puzzle measured about 4.5" square, so I ordered 5x7" prints of each of the photos, and then trimmed then down to match the puzzle size.


I applied Modge Podge to the back of one photo, then overlaid it on the puzzle pieces, and let it dry overnight.  Once dry, I trimmed around the outer edge so it would be nice and even, and then Modge Podged the second photo to the opposite side, allowing it to dry.

Once fully dry, I used an Exacto knife to separate the pieces, and trim excess from the edges of each piece.  And then I used Modge Podge to coat the outside of each piece to add some extra protection and help fill in any gaps.

Last step was to put it back in the frame and then use some cling wrap to cover it & keep all the pieces in place once I put it in with the rest of his gift:  A box of truffles from The Candy House (for us to share, of course), and a bottle of BARREL-aged beer (barrel = wood).  


In return, The Hubs made me a very sweet piece that is now hanging in our bedroom:


Along with another mystery gift that arrived unassembled while he was out of town for work, and that I didn't look at so as to keep the mystery intact. All I know is that a) it likely is made of wood, b) it's heavy and large, and c) the box also contains glass.  Quelle surprise!


If you missed it, I did a Wedding Week a few years ago—here’s the links if you’re interested: 

Monday, July 13, 2015

Fourth Wedding Anniversary: Fruit 'n Flowers

The day: July 10, 2011.
The place: Rogersville, Missouri
The weather: 103F & Sunny, with a brief (and blessed) breeze right around 1pm (the same time as our ceremony).
The peeps:  Me and this awesome dude I've known since I was 16, and about 150 of our friends & family.
The Cake: AWESOME.  As always.


This Friday, the Hubs & I celebrated our Fourth wedding anniversary--four years of marital bliss!  I still love being married to my best friend, staring at his beautiful blue eyes every morning (but like, not in a creepy way or anything), and laughing with him as much as possible.  I love him in spite of his mischievous inner child that thinks it's funny to wait until all the lights are out in the house and then let out a pterodactyl scream at the end of the hallway...and hilarious to hide in closets & jump out at you...

Year Four has been a good one for us.  We visited the Smoky Mountains together, sold our side business, and managed to (finally) make a baby after about a year & a half of trying (HINT: a relaxing week in Mexico with unlimited access to mojitos apparently REALLY helps).

If you missed it, I did a Wedding Week a few years ago—here’s the links if you’re interested:
For our first anniversary (Paper), I did this heart map collage; and for our second anniversary (Cotton), I made The Hubs a pillow with a collage of ticket stubs.
IMG_20120615_184235 IMG_20130709_182324

The third anniversary is Leather (or Glass for the “modern” interpretation), so he got a personalized leather luggage tag, a leather-bound men’s devotional book, and a fancy-schmancy tulip glass from Deschutes.

IMG_20140710_202805 IMG_20140710_190514

Fourth Anniversary is "Fruit or Flowers".  Sure, that's easy...if you're the guy.  (FYI--the "modern" option is "Appliances".  I tend to be of the opinion that an appliance is generally never a good romantic gift.)  So what do you get for the man in your life that's fruity, flowery, and yet still manly?

A)  A pie.  His favorite pie, in fact. (Coconut Cream, homemade--and let's not get into a debate over whether coconut is really a "fruit".  Most pies are fruit-filled, so that's the general idea--make yo' man a fruit-filled pie.  You know what he likes.  Aaaaand he'll probably share.)
B)  An iTunes gift card (Apple--get it?  Eh?  EHHH????)
C)  A kit to brew his own fruit beer, or a mixed pack of fruit beers (because the hops cover the whole "flowers" bit).  If your man's not a home brewer and you go for the latter, my personal recommendations are Leaky Roof's Bond Burner (Smoked Jalapeno & Pineapple--though TECHNICALLY this is a mead), Lazy Magnolia's Bramblin' Man (blackberry), Abita's StrawGator (strawberry), Shiner's Ruby Redbird (grapefruit), Piney River's Hot Date Ale (dates), and O'Fallon's Wheach (peach).  If you want to add another flower layer to the theme, hibiscus beers are trending right now (try Boulevard's Hibiscus Gose, Stone's Stochasticity Series Hibiscuscity...Or, if you live in the NOLA area & can get it, Courtyard Brewery's Mike's Hibiscus AleNOTE: I picked these because they're not overwhelmingly sweet or fruity--very well balanced beers.  Most dudes I know are not into super-sweet fruit beers/ciders, so your man should hopefully appreciate these.  If he's more of a wine guy--grapes are fruit.  Buy a bottle of his fave.  If he prefers hard liquor, find a distillery near you that makes infused liquors (our personal favorite--Copper Run sells infusion kits on their website; the apple pie moonshine is UH.MAZE.ING).  
D) A bottle of sparkling grape juice for you to share (since the baby belly has you playing permanent DD for a few more months)

For our anniversary celebration, we had a delicious dinner at Touch restaurant in Springfield, MO (though I was tempted to go with Aviary Creperie so we could gorge ourselves on fruit-filled crepes), followed by a showing of "Hairspray" at Tent Theater.

Dessert at Touch--chocolate flourless cake w/ raspberry coulee & mint chip frozen custard.  YUM.

Happy anniversary, love--and here's to four........ty plus more awesome years!

Sunday, July 13, 2014

Third Wedding Anniversary: The Leather/Glass Anniversary!

This Thursday marked our 3rd blissful year of marriage. Three years ago, it was crazy hot.  We were crazy nervous.  We were crazy for thinking we could have a midday Sunday wedding and people would dance (aside from the kids—the kids will always dance).  But that’s okay, because we’re a crazy bunch! 
DBK32
(…that will never win a synchronized jumping contest.)
Sadly, I spent most of my anniversary day in another town for a training class, but we’re going away for the weekend so that makes up for it.
Things I Learned in Our Third Year of Marriage:
  • If you decide to buy a “side business” with your husband while you both still keep your full time jobs…you might be crazy.  But you might also learn a lot, and get to eat a ton of ice cream.
  • If you decide to take a bus tour of New England, you might end up being the only Americans on the trip.  But this is okay, because a) it forces you to spend a lot of quality time with each other, b) you may learn how to distinguish various Asian communities from each other, and c) your Chinese tour guide will probably take you to the BEST Oriental buffet on the planet.
  • The Daniel Fast is tough—but it’s easier when you’re doing it together.
  • And finally—the secret to a happy marriage?  Is STILL separate bathrooms. :)


This one’s mine. Obvs.
If you missed it, I did a Wedding Week a couple years ago—here’s the links if you’re interested:
For our first anniversary (Paper), I did this heart map collage; and for our second anniversary (Cotton), I made The Hubs a pillow with a collage of ticket stubs.
IMG_20120615_184235 IMG_20130709_182324

The third anniversary is Leather (or Glass for the “modern” interpretation).  Unfortunately, I have no leatherworking skills, so making something myself kinda went out the window (well, to be honest, I thought about making him some “fruit leather”, but didn’t have an opportunity to sneak it in before our anniversary.)
However, I still wanted to stick with our travel theme.  So, I found a gal on Etsy who made personalized leather luggage tags, so I made him one in a bright color (figuring that would help him pick out his bag when we fly, since our luggage is black & gray):
IMG_20140710_202805
I also picked up a leather-bound men’s devotional book, and got us a half-price deal to do some ziplining (since you have to wear LEATHER gloves when you go).  Since there’s also that “glass” tradition, I also picked up him a fancy-schmancy tulip glass from Deschutes (a brewery we’ve recently discovered)—which would have been a perfect place to stow the fruit leather…bygones.  He’ll stow beer in it.  Temporarily, anyway. :) 
IMG_20140710_190514
For our anniversary, we touristed it up down in Branson:  got a room at the Chateau on the Lake, went to a dinner show (Marco Polo), and of course, checked out all the winery & brewery tours we hadn’t yet been on (Copper Run Distillery, Stone Hill, Bear Creek…also the microbrews at Charlie’s Steak-Ribs & Ale, but we weren’t impressed).
annvbooze
 Happy anniversary, Love!  Here’s to many, many, many more!
2011
DBK41
2014
annivers

Wednesday, July 10, 2013

Second (Cotton) Anniversary Gift Idea: Collage Pillow!

So today is my second wedding anniversary!  Yay!  Two years with my wonderful hubby.  Our wedding day was ridonkulously hot…
wedding 014
…and ironically, there’s a heat advisory for today as well.  It just helps us remember that wonderful feeling of sweating together up on a stage.
DBK48

Anyway, for our first year anniversary (the “paper” anniversary) I made this fun travel art piece:
IMG_20120615_184235
So for our second anniversary (the “cotton” anniversary), I wanted to stick with the travel theme.  Because it’s something we love to do together.  Just GO.  Whether it’s Europe or St. Louis, I just really love traveling with this man.  And I saw the “ticket stub pillow” on Pinterest and thought, “BINGO!!”
But I had trouble finding any one ticket that would work well for a pillow shape…so I decided to do a collage instead.
IMG_20130709_182324
So…here’s something you should know: because we have a small house with little to no privacy and are almost always in the same room, I knew I couldn’t make this at home.  So…this was made entirely at my office.  Furreals.  But that should show you just how easy this project is to do.  And honestly—a LOT of fun.
MATERIALS:
Ticket stubs
Iron-On Transfer Paper
Inkjet Printer
Fabric (I used a small “decorate me” type canvas tote bag, because two of the sides would already be stitched when I cut it down to make the pillow.  Since this would have to be hand-sewn, having two sides already done was a HUGE help.)
Iron
Needle & Thread (or sewing machine, if you’re not making this in your cubicle at work)
Poly-fil pillow stuffing

STEP ONE:  Choose your tickets. 
I wanted to use more of our stubs from our honeymoon; however most of those have been worked into a scrapbook, and I didn’t want to dismantle it for this pillow.  So I rifled through my box o’ ticket stubs that haven’t made it into a scrapbook yet.  I chose a wide variety of stubs—some from local sporting events, a plane ticket stub, a lift licket from one of our ski trips, a random train ticket from Germany that didn’t make it into the scrapbook, a ferry stub from our Canada trip, a ticket to an improv comedy show from Vegas, and the St. Louis Botanical Gardens.

STEP TWO: Make your Collage.
Take a blank piece of standard printer paper and start arranging.  Try to fill up the page as much as possible.  In retrospect, I wish I would have snagged a few small movie ticket stubs to help fill in the gaps.
IMG_20130702_103103

STEP THREE: Scan the Collage.
I scanned at a 400 dpi resolution with Photo quality to get the best result.  Save it as a JPEG, and then “flip” the image so that all the words are backwards.
collage
STEP FOUR: Print the Collage on Iron-On Transfer Paper.

Please note: You MUSTMUSTMUST use an inkjet printer to print the collage onto the iron on transfer.  Laser printers are too hot and will cause the iron-on stuff to melt off inside the printer.  Just…trust me on this one from past experience. :)  So…big thank you to our IT guy Kerry who found the only color inkjet printer in our office (inside someone’s office) and another big thanks to John, who let me take over his office for 5 minutes while printing this.

STEP FIVE:  Ironing!
Find an iron.  (Big thanks to my coworker Babsy who brought me an iron from her house so I could iron this at work.)  Iron your fabric first so that it’s nice & flat to start.  Then lay your transfer down; if you’re using something that’s pre-sewn on some sides, get the edges to match up as closely as possible.
IMG_20130709_173210
Ironing in my cubicle….not at all weird.  Right??? (I worked on this after hours to avoid odd looks from my coworkers.)
Follow the instructions that come with your iron-on transfer paper, and remember to press hard—especially on the edges where it’s pre-sewn.
Then slowly & gently peel the backing off.
IMG_20130709_173402
STEP SIX:  Trim Your Fabric & Stitch up the Open Sides.
Use the edge of the iron-on transfer as a guide to trim down the fabric.  Since about 1/2-inch will end up inside the pillow as the seam, you can trim up to half an inch away from the edge of that line.  Then flip the fabric inside-out, and stitch up the remaining two sides---but leave an opening of about 4 inches so you can flip it BACK right-side-out. Iron the edges to make a nice seam (but flip it over & iron the blank side so you don’t accidentally take off the iron on transfer.)
IMG_20130709_180549 Part  of the top edge of the iron on transfer didn’t get hot enough, so it looks faded there.  This is why you have to make sure to focus on the edges as much as the center.
STEP SEVEN: STUFF!
Fill your tiny pillow with poly-fill, and then stitch up the last edge.
IMG_20130709_181228
And voila!  You have a cute lil’ pillow and a really thoughtful anniversary gift.  To go with the less “thoughtful” but more “nerdy” t-shirt you bought him.
IMG_20130709_182551
Hope you have a wonderful time trying this craft out, and if you’re making it as an anniversary gift, many blessings to you and your partner!  May your days be filled with as many adventures and journeys as ours.

Oh…and because I have an amazing hubby (who let me have one of my gifts early), I can share that as well.  Because it’s so awesome that I had to wear it TODAY:
IMG_20130709_200351 I love him.  I really, really, really do. :D

Wednesday, September 5, 2012

Meltaway Cream Cheese Mints

How did I forget to post this recipe when I was doing my Ultimate Wedding Week countdown?  It would’ve fit in so perfectly.  Alas, I am imperfect.
Nary a worry!  Here I am to rectify the situation and introduce you all to the amazingly awesomeness that is: The Cream Cheese Mint.
These lil’ beauties are a tradition at my family weddings.  So of course, I HAD to have them at my own wedding last year. In my wedding colors, natch.  And I had just gotten a Kitchenaid from my parents as a pre-wedding gift…so it ONLY made sense to bust it out & spend three evenings cranking out hundreds of tiny mints.
Of course, we then somehow managed to completely FORGET to put them out at the reception.  300+ mints.  That my bridesmaid Babsy & I slaved over.  Completely forgotten.  Lost in the freezer behind the ice cream for the root beer floats.  It pains me, even to this day.
So, after the reception, my new hubby & I had all the extra “stuff” that wasn’t eaten at the wedding.  Ice cream, sandwiches, cupcakes, meatballs, fruit, and a quarter-ton of mints.  We started putting them on EVERYTHING.  Including the leftover ice cream.
IMG_0016 Tastes like love.
If you’re not cranking out hundreds of the lil’ buggers, they are actually ridonkulously easy to make. Only a few ingredients, a good mixer, and some mint molds are needed.  Technically, you don’t even need the mint molds—you can also just pat them flat, smash with a fork (a la PB cookie-style), or use small cookie cutters.  You can get plastic candy molds like these from on Amazon or at your nearest craft store for just a few bucks. 
mint molds
I also had some silicone molds that I borrowed from my aunts.  There are TONS of designs available; my aunts had some for Christmas, baby showers, graduations, etc.

I stuck with making green leaves, blue roses, and threw in some white fleur-de-lis for good measure.

Ingredients: (this will make about 5-7 dozen mints)
1 package (3 ounces) fat free cream cheese or Neufchatel, room temperature
1/4 teaspoon peppermint extract
food coloring (enough to get your preferred shade)
4 1/4 to 4 1/2 cups powdered sugar
Granulated sugar

Directions:
NOTE: if you want to make a couple different colors, just make half of a batch at a time.  Or you can make a plain white batch and then add your food coloring at the end, though it’s sometimes hard to get the color incorporated as well at the end…however, it can produce a really cool marbling effect, so that’s also a fun option!
Place your cream cheese & extract in a mixer and blend until smooth and the extract is well incorporated.  (Note: A stand mixer, such as a Kitchenaid, will make this recipe SUPER easy, since you can leave the beater running while you incorporate ingredients.) 
Add your food coloring.  Depending on what color you’re going for, this could be a lot, or not very much.  For the green you see above, I only had to use a few drops per batch.  However, I wanted a really rich blue for the roses, so it took considerably more food coloring to get it beyond a “baby shower blue” color.
Now, start adding your powdered sugar—about 1/2 cup at a time, in order to avoid the “there’s sugar everywhere and my kitchen looks like a meth lab” effect.  Your “dough” is ready once it’s firm and no longer sticky.  If it’s still sticky after 4.5 cups…add some more sugar.  You should be able to pull off a piece & roll it into a ball without it sticking to your hands, though it may still be slightly tacky.
Set up a “sugarcoating” prep station.  about 1/2 cup of granulated sugar in a small bowl will work.
Hygiene Note: You’re going to be handling this stuff with your paws, so now’s a good time to wash your hands.  With SOAP. 
Scoop out a small piece of the “dough”—the amount you need will depend on the size of your.  You’ll sort it out as you go; it might take a couple tries to guesstimate it right.  Roll it into a ball, and then drop that ball into your “sugarcoating” bowl.  Roll it around until it’s fully coated, and then press it into your mold.  The sugar on the outside keeps the mint from sticking to the mold, so be sure it’s fully coated.

Now, repeat like 59-83 times.

And the GREAT news?  These freeze perfectly.  You can make them up to a month in advance.  Then, on the day of your event, just take them out of the freezer that morning.

As you know, I was a wedding-crazed bride while I was making these…so I don’t have a ton of pics, since I wasn’t in “blogger mode”.  So instead, I’ve perused the interwebs for some fun examples of mints you can make using this basic recipe.
Fall is coming up, so some of these would be super cute:
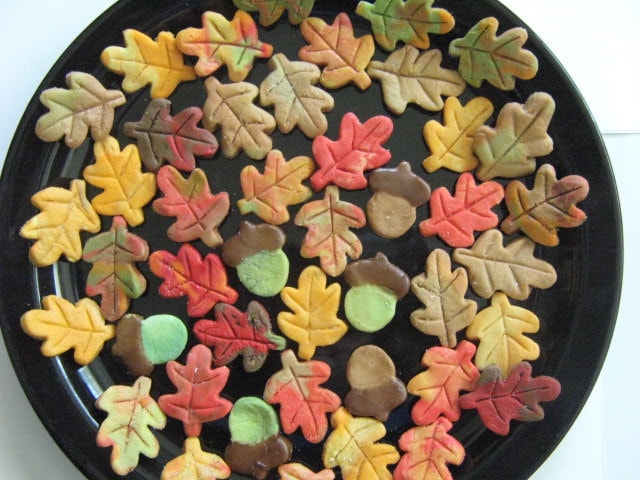
This would be some of that marbling I mentioned above. 
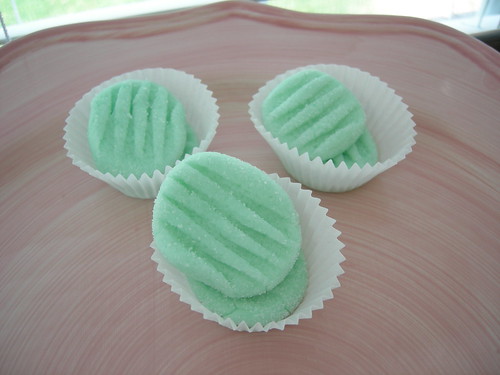
Or, if you don’t have mint/candy molds, you can also just lightly smash the sugared dough ball with a fork to make these simple lovelies:


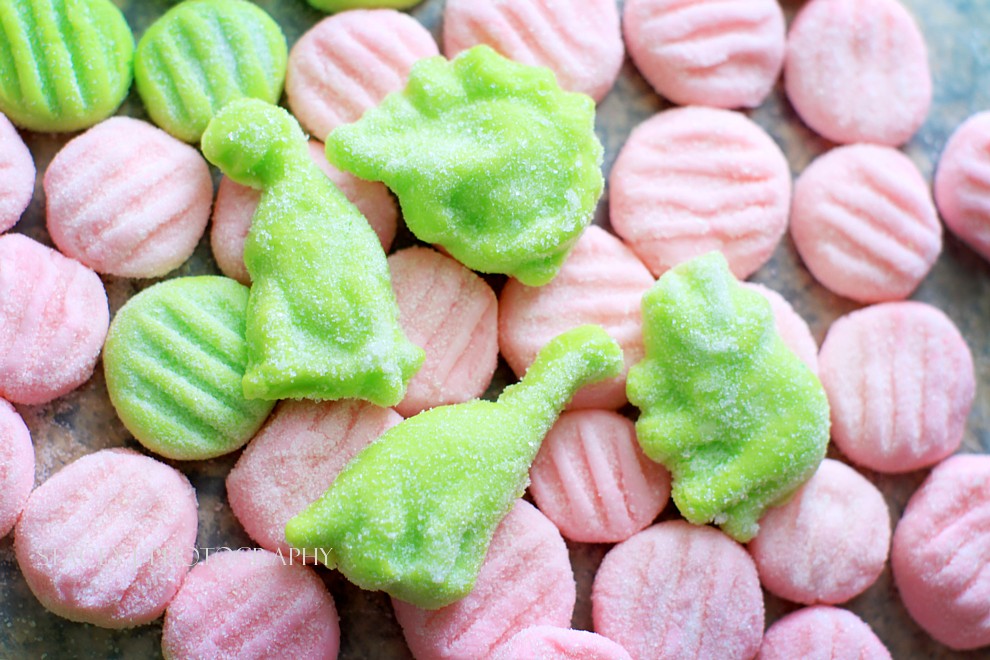
Another option if you don’t have mint/candy molds would be rolling the dough out, lightly dusting with sugar, and then using small cookie cutters, like this example:

Love those colors!!!

And THESE are simply gorgeous, if you’re really adventurous.  The creator used buttons to create their own silicone molds.  These would just be PERFECT for a vintage style wedding.


MINTY DINO’S!!!!  Love.

Are there any interesting traditions your family has at weddings?  I would love to hear about them!