Showing posts with label pecans. Show all posts

Friday, February 22, 2019

Homebrewing: Coconut & Pecan Spent Grain Cookies

Note: this post includes a lot of links to The Home Brewery Store, which is our local brew store--like, it's literally a block from our house.  But they also sell online through their website and Amazon.  We don't receive any compensation from them, we just really like all of their products, and think they are great people.  Their kits are all fantastic and will make you a great batch of beer.

The Hubs recently made the switch to all-grain brewing instead of extract brewing. If you're not a brewer, here's the nutshell version:

You need malt to make beer.  Malt is created by pulling the starch out of grains and converting it into fermentable sugar. In extract brewing, someone has already soaked the grains to make malt, and then condensed/dehyrated it into a bag, that you can just add to water with your other ingredients.  

This method is quicker (total brew time of about 2-3 hours with sanitization and cleanup), but more expensive--because you're paying for convenience.  For example, the last extract brew we did was a replica Schlafly Pale Ale, and all the ingredients cost us about $75, for 5 gallons (roughly 50 bottles of beer, or $1.50/each, just in ingredients).  Most home brew stores sell kits that include malt extract, and the kits range from $25-$50 for 5 gallons worth of beer.
In all-grain brewing, you buy grains (cheaper), grind/crack them, and then soak them yourself to make your own malt.  This is less expensive, but your total brew time (with sanitization and cleanup) goes up to about 5-7 hours.  Since switching to all-grain, our average cost per 5 gallon batch is closer to $20, and you have a lot more freedom in customizing how you want your beer to look/taste, vs. using a kit. 

And...it also means you now have about 10-12 pounds of "spent" (used) grains to get rid of, once you've gotten all the sugars you need from them.  And you're left with this:

Note: this is a mix of barley and corn, for a light lager.

Damp, high-fiber grains with most of their natural sugars removed--but most of the protein does NOT leach out of them in the cooking process, so they do still have some nutritional value.


What do you do with it?

Well, if you have chickens, or friends who have chickens, you can put the still-damp grains into gallon freezer bags, freeze them, and thaw as you need to use as chicken feed.  You do have to keep them cold or frozen otherwise they'll go rancid.  I've been giving most of our spent grains to my coworker and she says her chickens went NUTS for it.

Or, you can spread the grains on a cookie sheet and dry them in a low-temp oven (200F) for a few hours, then put them in a blender or food processor to make spent grain flour that can be used in all kinds of recipes.  This sounds like a great idea, but because it involves multiple steps, and I'm lazy, I've not done it.

OR...you can scour the interwebs for recipes that use fresh, still-damp spent grains, no extra processing needed.  And find one.  This one.
FYI, I love these cookies SO much.  They're soft and moist and a little cakey, but with lots of flavor and texture from the coconut and pecans.  And the spent grain makes them high in natural fiber and gives them a little extra protein. (Note: recipe below has been modified slightly from the original.)

INGREDIENTS:
- 5 Tbsp butter, softened
- 1/2 cup brown sugar
- 1/2 cup molasses or Steen's Cane Syrup
- 1 large egg
- 1 tsp vanilla extract
- 3/4 cup all-purpose flour
- 1/2 tsp baking powder
- 1/2 tsp salt
- 1 tsp cinnamon
- 1/2 tsp nutmeg
- 1/4 tsp allspice
- 1.5 cups damp spent grain
- 1 cup chopped pecans
- 1 cup coconut

DIRECTIONS:
Preheat oven to 350F.

Cream together the sugars and butter, then add the egg and vanilla.  Then add in the dry ingredients. Fold in the pecans and coconut last using a spatula.
Scoop onto a lined cookie sheet (I like these silicone cooking mats, but parchment paper works just as well) and bake for 20-25 minutes.  Let cool and enjoy!  (These are great warm or room temp).  Store in an airtight container for up to 7 days.


Thursday, February 7, 2019

Satsuma Pecan Muffins

So, if you're from outside of the Gulf Coast or California, you may be asking, "what's a satsuma?"  That's because up here, they go by other names: Halos, Cuties, Sweeties.... Yes! Those little mandarin oranges, that are so great to snack on (for kids and adults) because they peel easily and don't have big seeds.  
Satsumas are a popular backyard tree in Louisiana, where the temperate climate serves them well. They originated in Japan in the 1800's, but Louisianians have definitely adopted them into their culture.  Abita makes a Satsuma beer, you can get a satsuma snowball, find satsuma marmalade, and there's even a town named Satsuma.

We keep a stockpile of mandarins in our car because I can easily eat them while driving, as can Lil' Man (without making a big mess in his car seat).  I also like that they're a good food to share with panhandlers or the homeless (oranges and bananas are both great for this, but oranges stay better in your car longer.  A lot of folks who need some help don't have great teeth--I've tried to hand out apples before and had them politely turned down because they couldn't bite into them.)

And they're super-cheap this time of year (because they ripen from October - December), so we always have a 3 lb bag of them in our house.  But that also means that we need to go through them all, which can be a challenge.  So I started looking for recipes to use them in, and found this one!
Full disclosure, today's recipe is a spin from one over at CuliCurious. I've made enough changes to sort of "make it my own", but I have to give credit where it's due, because I don't think I would have thought to make muffins from them on my own.

INGREDIENTS:
2-3 satsuma mandarin oranges, plus 1 tsp orange zest
1.5 cups flour
0.5 cup old fashioned oats
1/2 cup unpacked brown sugar
2 tsp baking powder
1/4 tsp salt
1/2 tsp nutmeg
1/2 tsp cinnamon
2 Tbsp Steen's cane syrup
2 large eggs
0.5 cup plain Greek yogurt
6 Tbsp melted unsalted butter
1/2 cup pecan pieces

DIRECTIONS: (makes 6 jumbo muffins or 12 standard muffins)
Preheat the oven to 400F.

In a blender or food processor, add the peeled satsuma pieces and pulse until pulpy. Should make about 2/3 cup of liquid.  To this, add the other liquid ingredients (cane syrup, eggs, milk, yogurt, melted butter, ) and mix until combined.

In a large bowl, combine the dry ingredients (flour, oats, brown sugar, baking powder, salt, nutmeg, zest, cinnamon) and mix to combine, then add the liquid ingredients, but don't overbeat--it's okay if there's a few lumps.

Gently mix in the pecan pieces, and then let rest for 5 minutes before transferring into greased or lined muffin tins.  We made 6 large "Texas-size" muffins, but would also make about 10-12 standard muffins.

If making jumbo muffins, bake for about 20 minutes...if making standard muffins, about 15 minutes.  Check with a toothpick--the toothpick should come out clean and the edges of the muffins should be pulling away from the tin.
Transfer to a cooling rack once done--if you let the muffins cool in the tin, heat/steam can't escape fast enough and they can end up being mushy.
Note:  I originally made these with just 4 tablespoons of butter, and they ended up a touch dry, so we added butter.  The recipe above calls for 6 tablespoons of butter so they should be nice and moist.


Tuesday, December 25, 2018

Steen's & Tabasco Spiced Pecans

Hey y'all!  MERRY CHRISTMAS!!!  I hope you're having a wonderfully relaxing day full of mulled wine, cider, and hot cocoa (while your kids play quietly/destroy your in-laws house).  I wanted to share a little Christmas snack with you (that pairs well with beverages of all types).
This idea came to me while I was having a beer at Lost Forty Brewing down in Little Rock, Arkansas.  They have these AMAZING molasses & black pepper glazed pecans that I have to get every time I'm down there.  
I like to make glazed pecans around the holidays (because they're delicious and make your whole house smell like a spice factory). I've shared a few different recipes for spiced pecans with you before--some in the oven, and some made using the microwave.

But this time I decided to "Cajun" the recipe up a bit...by using Steen's Cane Syrup instead of molasses.  Steen's has been around since the early 1900's, based out of Abbeville, LA (just south of Lafayette).  Sugar cane is big business in that part of the state: about $2 Billion worth of business, covering about 400,000 acres of farmland across 22 parishes, and providing jobs to about 17,000 Louisianians.  

I see Steen's used much like some folks would maple syrup or honey--drizzled over pancakes, served with biscuits, mixed in with glazes for BBQ...there's tons of recipe ideas on their website.
Also, because I like my spiced pecans to be sweet, smoky, salty, and spicy, I wanted to add in some Tabasco Chipotle Pepper Sauce.  If you haven't tried this yet...MAN.  You are missing out. It is the #1 used condiment in our house, and goes great with nearly everything.  Scrambled eggs, chili, grilled meat, pepper jelly, queso sauce... I even added some to a beef stroganoff the other night. It's a really well rounded, balanced flavor profile with just enough heat.

This is a super-easy, quick recipe. Takes about 10 minutes of actual labor to make, then you just let them cool and package them up!  I made several batches this Christmas to share with coworkers.

INGREDIENTS:
3 Tbsp butter
3 Tbsp Steen's cane syrup
3 Tbsp brown sugar
2 tsp ground black pepper
2 tsp Tabasco Chipotle Pepper Sauce
1 tsp cinnamon
3 cups pecans (about one 12 oz bag)

DIRECTIONS:
Preheat your oven to 350*F.
In a large saucepan, combine all of the ingredients except the pecans and stir over high heat, until it comes to a boil.  Then add your pecans and stir continuously for about 3 minutes--the syrup will start to thicken (but don't let the syrup  burn).

Then transfer the pecans to a parchment-lined baking sheet pan, and separate as much as possible using a spatula.
Bake for about 7 minutes, then remove from the oven, separate pecans more if needed (otherwise they'll cluster together when cooled), and let cool completely.
Store in an air-tight container for up to 2 weeks. If you try them, please let me know what you think!

Friday, December 21, 2018

Dickey's Pralines

So earlier in the week I shared the first half of my candy-making adventure with my friend Amy. Now it's time for the rest: PRALINES!
I've made pralines before, from my friend Nana D's recipe. So this time, Amy brought her brother-in-law Dickey's recipe.

INGREDIENTS:
2 cups sugar
1 stick butter
16 large marshmallows
1/2 cup evaporated milk
2 cups chopped pecans
1 tsp vanilla

DIRECTIONS:
These are another candy that can be a bit finicky about weather, but not as much as divinity.  Even so, best to make this on a low humidity day.

Put all the ingredients in a pot, except the vanilla.  Cook over medium heat until the marshmallows melt.  Stir constantly, until at soft ball stage (about 240-250*F).  
Remove from the stove, add vanilla, and beat until thick.  Then spoon onto parchment paper and let rest until cooled completely.
So--in the interest of candor:  Our first batch didn't set up properly.  We only brought them up to about 236*F, forgot to add the vanilla, and then didn't really do the whole "beat until thick".  As such, the batch we made at my house stayed soft, like a caramel.  Still super delicious, but a little limp and sticky*.  They did finally start to properly harden the next day.*

* "That's what she said."

As I mentioned in the last post, I decided to dip some of them in chocolate.  I figured if they didn't harden up, at least the chocolate would add some structural integrity.
Amy decided not to accept defeat, and made a second batch at her house the next day.  We met up during the work week and swapped candies: I gave her half of the divinity (and some of the chocolate dipped pralines) and she shared some of her properly set pralines.  And I gotta say--while the first batch were really tasty, the second batch with the vanilla---man.  It's crazy to think how much just a tiny bit of vanilla rounds out a flavor profile.

Sunday, December 20, 2015

Pecan Sweet Potato Casserole

I made this dish for Christmas last year, and now I think it's my "signature" dish that I'm required to bring to all holiday functions.  Even the kiddos loved it (who previously wouldn't eat sweet potatoes)-- "it tastes like pie!" they told me.  Honestly, I didn't eat sweet potatoes at the holidays until I was in college--even that weird coating of marshmallows couldn't entice this kid to try them.  However, if the sweet potato casserole at my family functions would have looked like this, I probably would have tried them a lot sooner!
Looks more like my mom's apple crisp, and less like somebody baked a box of Lucky Charms.

This is also great if you have to travel for the holidays--you can make the two parts separately ahead of time, refrigerate, and then put the topping on the casserole when you get where you're going and just bake for 30 minutes.

What I also love?  This is SUPER easy to make.  Even with a fussy 2 month old in the next room.  AND you can take super-cute Christmas photos of him after you put the casserole in the oven.


INGREDIENTS:
filling:
3 cups cooked & mashed sweet potatoes
1/3 cup sugar
1 Tbsp vanilla
1/2 Tbsp cinnamon
1/4 tsp nutmeg
2 eggs
1/2 cup half & half
topping:
1 stick butter, room temperature
1 cup brown sugar
1/2 cup flour
1/4 cup rolled oats
1 cup chopped pecans

DIRECTIONS:
Start with the topping, as you'll want to chill it after all the ingredients have been combined--this results in a beautifully crisp crumble topping.
Combine the topping ingredients in a medium sized bowl, using a pastry cutter or a fork until crumbly.  Stick in the fridge for at least 30 minutes.
When ready to bake, preheat the oven to 350F, and lightly spray a 9"x 13" pan with oil or cooking spray.
For the filling, combine all the ingredients in a large bowl or stand mixer and blend until thoroughly mixed.  Then place in the baking dish, and add the crumble topping.  Bake for 30 minutes, and then allow to cool for about 5-10 minutes before serving.


Tuesday, December 24, 2013

Microwave Spiced/Candied Pecans

Hey kids!  Back today with more quick sweet treats for the holidays!  Spiced nuts are a must in our house this time of year.  Having a bowl of these in the kitchen is perfect when that inevitable sweet tooth comes calling—just grab a couple and you’re good!  Better for you than a cookie or that marshmallow fudge the neighbor’s brought by!

In year’s previous I’ve always made my spiced pecans in the oven, but this year my husband tipped me off to a microwave version, and I gotta say, it’s pretty fantastic!

IMG_0992

Note: we like our pecans with a little kick, but if you’re more of a sweets-only fan, you can omit the cumin & cayenne.


Ingredients:

1/4 cup light butter

1/2 cup brown sugar

1/2 tsp nutmeg

1/4 tsp clove

1 tsp cinnamon

1/8 tsp cumin

1/8 tsp cayenne

2 Tbsp water

3 cups pecan halves

1/4 cup granulated sugar (for coating the pecans afterward)


Directions:

Melt the butter in a 4 qt glass casserole dish, then add the sugar, water & spices, mix & microwave for 1 minute.  Stir in the nuts & mix to coat well.

IMG_0985

Microwave the nuts for 4-5 more minutes, stopping to stir them once every minute, until most of the syrup is coated onto the nuts.  Then pour out onto a sheet of wax paper & let cool.

Once cooled, place the nuts into a large plastic bag with the sugar, and shake the bag to coat them well.  The sugar helps to keep the pecans from sticking to each other.

IMG_0992

Monday, October 22, 2012

Caramel Pumpkin Pecan Cake!

Know what I love about this time of year?  Pumpkin EVERYTHING.  Pumpkin pancakes, pumpkin waffles, pumpkin lattes, pumpkin muffins…bring it on.  I will devour every. last. morsel.  However…while pumpkin itself is quite good for you (Vitamins A, C, B, & E, antioxidants, dietary fiber)…what we tend to make with it is typically rich, fatty, and sugar-laden.

I offer you a DELICIOUS alternative.

This recipe comes from my amazing friend/coworker Suzan.  Why is Suzan so amazing, you ask?  Well, aside from her decadently sarcastic & witty demeanor, and being one of the most experienced scientists in our company, she’s also lost over 100 pounds in the last year.  Yes, you read that right… OVER. ONE. HUNDRED. POUNDS.  No gastric bypass, no crazy diets, just the tried & true common sense “eat less, move more” methodology.   Or, what I call the “get off the couch & back away from the Krispy Kremes” method…which I could stand to implement a bit more in my own life.  (I currently have a Chefville addiction… *sigh*)

Anyway…Suzan has started her own wonderful blog which you can read HERE, and you should, because she cracks my schtuff up. For realz.  Go there.  (Then come back here…we have CAKE to discuss.)

…you’re back?  Great.  Now, in case you missed it…this recipe came from my awesome friend who just lost 100 lbs.  And she ate this cake while on this plan.  I won’t go so far as to say, “this cake will make you lose weight”…but you CAN eat it while implementing your own personal “eat less, move more” lifestyle change.  It originally comes from this Weight Watchers recipe*, but I modified it a LEEETLE bit to taste & based off Suzan’s recommendations.

IMG_2202

Dear Reader: Please meet 217 calories of HEAVEN.

Ingredients: (makes 16 servings)

15 ounces canned pumpkin puree (NOT pie filling)
12 ounces fat-free evaporated milk
1/4 cup fat-free egg substitute (or 2 egg whites)
1/2 cup Splenda or other sugar substitute
4 teaspoons pumpkin pie spice
1 box unprepared white cake mix - (18.25 oz; Check labels & pick the lowest calorie option, as there’s a lot of variety between mixes.  Best Choice ended up being the lowest at my store.)
1 cup pecan halves, chopped
1/4 cup reduced-calorie margarine – melted (if you have spray butter substitute, like the
Smart Balance spray, use this.  It makes it a lot easier to fully coat the top of the cake.)
2 tablespoons
Sugar-Free Caramel Topping


Sugar Free Whipped Cream (optional garnish)

More sugar-free caramel topping (optional garnish)


Directions:

Heat your oven to 350F, and then lightly spray a 9x13 pan with cooking spray.

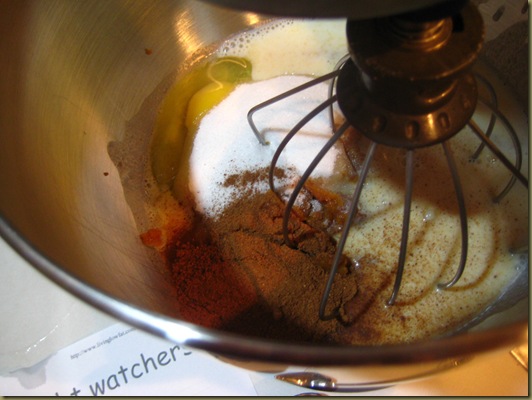
Mix the pumpkin, milk, eggs, sugar, and pie spice together in a large bowl, then pour into your cake pan.
IMG_2135

Spread the dry boxed cake mix over the top of the pumpkin batter.  Use a spatula to press the cake mix down into the batter until the mix starts to become moist. (Note: If you leave any dry mix, it will still be dry after baking.  Just FYI.)

IMG_2139

Next, sprinkle your chopped pecans on top, and then drizzle the margarine over as well.  Try to cover as much of the cake as possible with the margarine to get good buttery coverage. :D
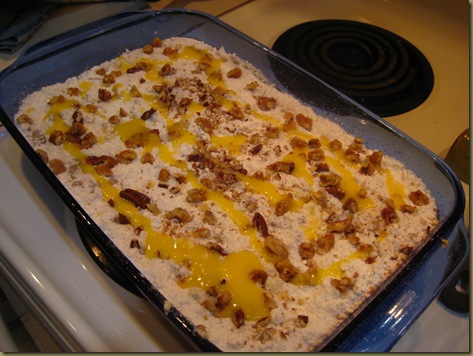
IMG_2141 (In retrospect, I should have totally used Suzan’s suggestion about the spray bottle.  I ended up with a lot of dry cake batter on the top of mine.)


Now: this is where I deviate from the original recipe.  I have sugar-free caramel topping in the fridge.  And pumpkin & pecans just scream “GIMME CARAMEL!”, so I drizzled 2 tablespoons over the top.  I used a fork to get a really fine drizzle & good  coverage.

IMG_2145

Bake uncovered for 50-60 minutes, let cool, then slice into 16 pieces (you’ll end up with pieces that measure about 2” x 3”).  The pecans, butter, caramel & dry cake mix combine to make a nice crispy, streusel-y topping.

 IMG_2163

Serve garnished with an extra sprinkle of pumpkin pie seasoning, a dollop of sugar-free whipped cream (if desired), and a wee drizzle of additional caramel sauce (about 1 tsp). 
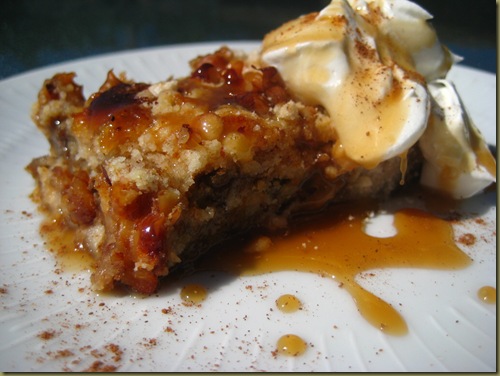
IMG_2198

NOTE: Whipped cream & extra drizzle of caramel sauce adds 25 calories to each serving.


*NOTE: try as hard as I might, I could NOT get my NutriFacts to match up with “86 calories” shown on the original recipe page, even after accounting for the slight recipe changes.  I double- and triple-checked all my ingredient stats, so my best guess is that they have a typo & their page should read “186 calories”.  The white cake mix alone is 127 calories/serving.

NutriFacts: (Weight Watchers Points per serving = 5)

Calories 192.8 (217 calories with whipped cream & addt’l caramel drizzle garnish)

  Total Fat 7.9 g

  Saturated Fat 1.3 g

  Polyunsaturated Fat 1.7 g

  Monounsaturated Fat 2.5 g

  Cholesterol 1.0 mg

  Sodium 243.8 mg

  Potassium 119.0 mg

  Total Carbohydrate 28.3 g

  Dietary Fiber 1.9 g

  Sugars 14.6 g

  Protein 4.5 g

Monday, July 23, 2012

Louisiana Pancakes: Blackberries & Pecans, oh my!

During my last trip down to Louisiana, I had breakfast with my best friend & her husband at T’Coons, one of the best breakfast spots in all of Lafayette.  I downed a (couple) cups of Mello Joy to wash down some sweet potato pancakes w/pecans.

IMG_1394

So once I got home and got this horde of blackberries…I of COURSE had to have more pancakes to go with my homemade syrup.  Fluffy cake, juicy blackberries, and crunchy roasted Louisiana pecans?  This is a no brainer.

IMG_0800


Ingredients:
  • 3/4 cup all-purpose flour
  • 1-3/4 teaspoons baking powder
  • 1/2 teaspoon salt
  • 1-1/2 teaspoons white sugar
  • 1/2 cup and 2 tablespoons milk
  • 1 egg yolk
  • 1 tablespoon and 1-1/2 teaspoons butter, melted
  • 1/2 tsp cinnamon
  • 1/2 cup blackberries (ours were rather large, so I quartered them)
  • 1/2 cinnamon stick
  • 1/4 cup pecans
  • 1 tbsp butter
  • Blackberry syrup

Directions:
First, we need to toast our pecans.  This isn’t 100% required, but I think it really makes the pecans pop w/flavor.

Heat a skillet over medium-low heat, and add 1 tbsp butter/margarine, the cinnamon stick, and the pecans.  Toss so the butter coats the nuts and the cinnamon stick gets to mingle with everybody.
IMG_0781

Toss for about 5-7 minutes; just until you start to be able to really smell the pecans.  Then you can turn them onto a cutting board, discard the cinnamon stick, and then chop the pecans.

IMG_0789

Now, mix your pancake batter.  That’s the first 8 ingredients (flour through cinnamon).  Mix til lump-free.  If it seems a little thin, add a lil’ bit more flour.

IMG_0785


Use the same skillet you roasted the pecans, and add your favorite non-stick spray (we like butter flavored) and heat to medium.  

Now, go back to your batter.  Add the blackberries & the pecans.

IMG_0793

NOTE: If you have small blackberries, you can opt to not mix the berries & pecans into your batter.  I tried that originally…however, my blackberries were HYYOOOJJ so when I went to flip the ‘cakes, the opposite side wouldn’t make full contact with the pan, and I ended up with broken pancakes:

IMG_0794


Plus, by mixing it in, you get more berry in each bite.

I used an ice cream scoop to keep my pancake sizes pretty uniform:

IMG_0798

Now—the magic of pancakes…waiting for when it’s OK to flip.  Just watch for the bubbles, and keep checking the edges.  when there are bubbles in the center of your cake, that indicates it’s cooked through in the middle, and OK to flip.  But just keep a good eye as you check the edges and your heat—these can burn easy, and your stove temps may vary.


When you’ve got a couple cakes to stack up, drizzle with your blackberry syrup and garnish with a few fresh berries.


Proceed to chow down. Makes about 8-10 pancakes (1/2 cup batter per cake).  Serve each stack w/about 2 tbsp of syrup.


Nutrifacts:
Calories 155.2
  Total Fat 8.4 g
  Saturated Fat 1.1 g
  Polyunsaturated Fat 2.7 g
  Monounsaturated Fat 3.2 g
  Cholesterol 39.1 mg
  Sodium 333.9 mg
  Potassium 99.3 mg
  Total Carbohydrate 16.8 g
  Dietary Fiber 1.6 g
  Sugars 2.3 g
  Protein 3.3 g