If you've been around a while, you know The Hubs is a homebrewer. We've been making beer since before we had Lil' Man (mostly him--I help with cleaning and any tasks that require an extra set of hands). Which got me curious: I know there are plenty recipes for "quick" beer breads, but what about a SOURDOUGH beer bread? The Googles sent me to King Arthur's recipe, which calls for "malted flaked wheat".
We deliberated over the benefits of going with one or the other: the flaked wheat would be closer to the texture, but the malted wheat would provide a more malty flavor. I decided flavor was more important (because the cracked wheat would add it's own, interesting texture). Then they asked, "red wheat, or white wheat"? Todd, one of the owners, noted white wheat would be more mild, while the red wheat would add some spicy or peppery notes. I chose the red, which they milled for me onsite (not down to flour, but cracked to allow better access to the starches inside). They sold me a "heaping cup's" worth for a whopping 50 cents. TAKE THAT, KING ARTHUR!!! HUZZAH!
Also picked up some wheat & rye flour at the bulk foods store.
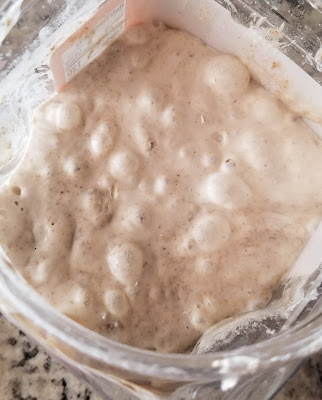
After learning my lesson with some previous recipes, I made sure we started this one with a VERY happy, bubbly starter, which I'd added some whole wheat & rye flour to for an extra boost of nutrition. And we transferred Mandough into a much more appropriate container.
INGREDIENTS:
Soaker: 120g of malted red wheat, milled + 113g boiling water (combine & set aside for later)
Dough:
- 227g active, bubbly starter
- 255g homebrew (we used a Dunkel)
- 210g AP flour
- 210g bread flour
- 21g raw honey
- 12g salt
DIRECTIONS:
Combine & set aside your soaker for later. (Note: this smelled like Grape Nuts and I kinda wanted to try a bite.)
Next, combine your starter, beer, and flours in a stand mixer with a dough hook and let it go for about 3 minutes on the lowest speed. Then let it rest for 30 minutes (autolyze). After the rest, add the soaker, honey, and salt, and mix on the lowest speed for 1 minute or until fully incorporated.
Then turn the mixer speed up by ONE and let it go for about 3-4 minutes. It should be somewhat tacky but fairly soft and supple. The extra hydration from the malted wheat soaker will make it a fairly loose dough. Cover and let it rise for 1 hour.
Turn it out onto a lightly floured surface and gently fold (I like the envelope fold) a few times, stretching the dough as you go. This is a high hydration dough so it won't be too difficult. Then place it back in the bowl and rest for another hour.
After the hour has passed, repeat this folding process and let rest for one more hour (should be at a total of 3 hours of rise time at this point). Because this is such a high hydration dough, it might warrant some extra folds. Note: if did this again, I'd use all bread flour to help add some extra gluten & structure.
After the final rest, turn out onto a floured counter & shape into a round (Note: because of the extra hydration, you could also roll this & put it into a loaf pan to add some structure.). Cover with lightly greased plastic wrap & let set for 20 minutes. As you can see--my round kept flattening out. So I did a few extra folds in an attempt to give it some more structure.
After that rest, I tried to shape it into a slightly tighter round, placed a floured tea towel in a bowl, and then turned the boule into the bowl, seam side up, & let rise for another 3ish hours.


No comments:
Post a Comment